Batard Bread
Discover the art of baking batard bread at home! Enjoy its crispy crust, soft crumb, and versatile flavors with this easy step-by-step recipe.
Ingredients
Basic Ingredients
- 3 ½ cups bread flour: This flour provides the structure and chewiness that’s signature to batard bread. You can also substitute a portion with whole wheat flour for a nuttier flavor.
- 1 ½ teaspoons salt: Enhances the flavor and strengthens the dough’s structure during baking.
- 1 teaspoon instant yeast: Ensures a steady reliable rise for a light and airy interior.
- 1 ¼ cups warm water 105-110°F: Activates the yeast and hydrates the flour for proper gluten development.
- 1 tablespoon olive oil optional: Adds a touch of richness and softness to the dough.
Optional Add-ins for Customization
- Seeds: Try sesame sunflower, or poppy seeds for added crunch and texture.
- Herbs: Fresh rosemary thyme, or oregano can elevate the flavor profile.
- Grains: Incorporate rolled oats or cracked wheat for a hearty twist.
Tools You’ll Need
- Mixing bowl: For combining your ingredients and forming the dough.
- Kitchen scale: Ensures accurate measurements for consistent results.
- Proofing basket or bowl: Helps the dough hold its shape during the final rise.
- Parchment paper: Makes transferring the dough seamless and prevents sticking.
- Dutch oven or baking stone: Creates the perfect environment for a crusty loaf by trapping steam.
Instructions
Step 1: Mix the Dough
- In a large bowl, combine the bread flour, salt, and instant yeast using a whisk or your hands to evenly mix the dry ingredients.
- Slowly pour the warm water into the bowl while stirring with a wooden spoon or your hands. Mix gently until the dough starts coming together into a rough, slightly sticky mass.
- If you’re using olive oil, add it now and lightly knead the dough in the bowl until it begins to form a cohesive texture.
Step 2: Knead and Develop Gluten
- Transfer the dough onto a lightly floured surface. Use a kneading motion—press, fold, and turn the dough—for about 8-10 minutes until it becomes smooth, elastic, and easy to handle. If it feels too sticky, sprinkle a small amount of flour, but avoid using too much to maintain the dough’s softness.
- Alternatively, you can skip traditional kneading and use the “stretch-and-fold” method: stretch one side of the dough, fold it over, and rotate the dough 90 degrees. Repeat this every 30 minutes over 2 hours to gently develop gluten strength.
Step 3: First Rise (Bulk Fermentation)
- Place the dough in a greased bowl, ensuring it’s lightly coated to prevent sticking. Cover the bowl with a damp towel or plastic wrap, and let it rest in a warm spot for 1-2 hours. By the end of this stage, the dough should noticeably increase in volume.
- To check if it’s ready, press your finger into the dough gently. If the indentation fills back slowly, the dough is properly proofed.
Step 4: Shape the Dough
- Gently deflate the dough to release any air bubbles and transfer it to a floured work surface.
- Shape it into a batard loaf by flattening the dough into a rectangle, folding the edges inward like an envelope, and rolling it tightly into an oval shape. Seal the seam by pinching it closed.
- Place the shaped dough, seam-side down, on a piece of parchment paper or into a proofing basket to hold its shape.
Step 5: Second Rise (Proofing)
- Cover the dough loosely with a damp towel or plastic wrap and let it rise for 30-45 minutes until it becomes slightly puffed. Be cautious not to over-proof it, as this can affect the final texture and oven spring.
Step 6: Preheat the Oven
- As the dough undergoes its second rise, set your oven to preheat at 475°F (245°C). Be sure to heat your Dutch oven or baking stone at the same time to ensure the perfect baking environment.
Step 7: Score and Bake
- Once proofed, use a sharp knife or bread lame to score the top of the dough with shallow cuts. These slashes create space for the dough to expand beautifully as it bakes.
- Carefully transfer the dough to the preheated Dutch oven (or onto the baking stone), cover it with the lid, and bake for 20 minutes. Then, remove the lid and continue baking for another 15-20 minutes, or until the crust is deep golden-brown and crisp.
Step 8: Cool and Enjoy
- Remove the bread from the oven and place it on a wire rack to cool completely. Cooling the bread allows the crumb to set properly and prevents it from becoming gummy when sliced.
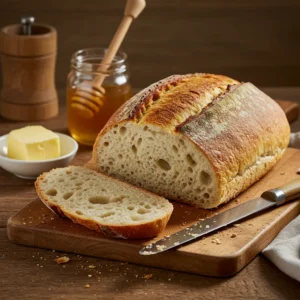
- Once cooled, slice your loaf and enjoy it fresh with butter, olive oil, or your favorite spreads.
Notes
Nutrition Information (per serving):
- Calories: 180
-
Fat: 2g
- Saturated Fat: 0.3g
-
Carbohydrates: 34g
- Fiber: 2g
- Sugar: 1g
- Protein: 6g
- Sodium: 350mg