
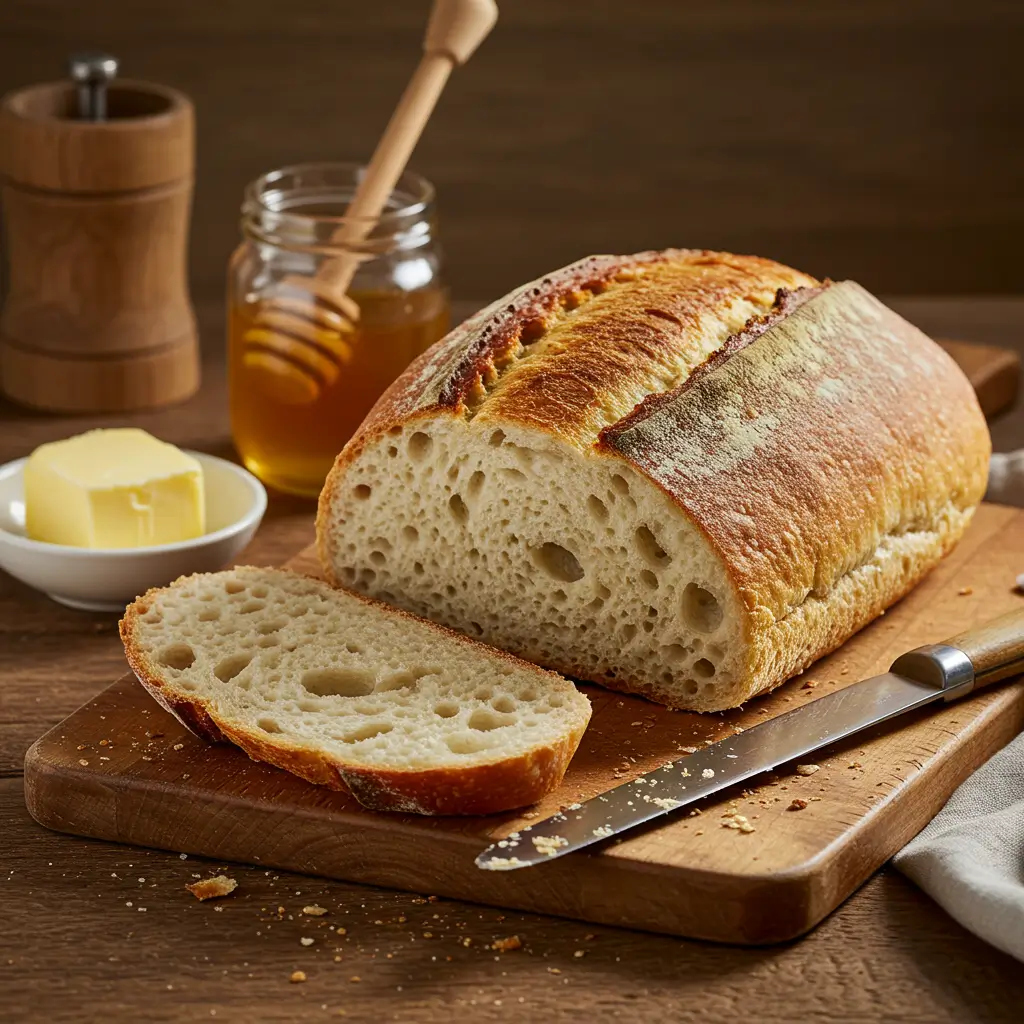
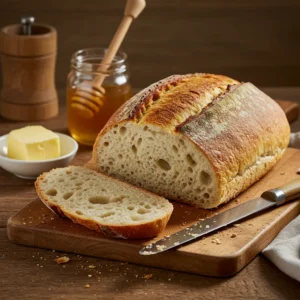
Have you ever wondered what makes batard bread so special? This rustic, artisan loaf is a true testament to the magic of homemade baking. With its golden crust, soft interior, and versatile flavor, batard bread is the perfect choice for both beginners and seasoned bakers. Whether you’re serving it alongside a hearty stew or simply enjoying it with a swipe of butter, this bread brings a touch of French bakery charm right into your kitchen. In this recipe, I’ll guide you step-by-step to craft a pro-level batard loaf at home—no fancy tools or bakery skills required. Let’s roll up our sleeves and begin!
Key Benefits of Batard Bread
Batard bread isn’t just another loaf—it’s a versatile masterpiece that combines simplicity with sophistication. Whether you’re an experienced baker or just starting out, making batard bread at home comes with incredible benefits:
- Perfect Balance of Texture and Flavor: The golden, crusty exterior contrasts beautifully with the soft, airy interior, delivering a delightful bite every time. It’s the kind of bread that feels gourmet without being complicated.
- Impressive Yet Beginner-Friendly: Unlike other artisan breads, the batard shape is easier to achieve, making it a fantastic choice for those new to bread shaping. No need to feel intimidated—you’ll get the hang of it in no time!
- Endlessly Versatile: This loaf adapts to any occasion. Serve it as a side with soups and stews, use it for hearty sandwiches, or simply toast it with a drizzle of olive oil for a quick snack.
- Customizable for Every Taste: Experiment with different flours, seeds, or herbs to make the recipe uniquely yours. From whole wheat to rosemary-infused batards, the possibilities are endless.
- A Rewarding Baking Experience: There’s something deeply satisfying about crafting your own bread. The process of mixing, shaping, and scoring isn’t just therapeutic—it’s also a skill that you’ll proudly master.
Making batard bread at home isn’t just about the end result; it’s about embracing the journey of creating something with your own hands. Ready to experience these benefits for yourself? Let’s dive into the ingredients and start baking!
Ingredients
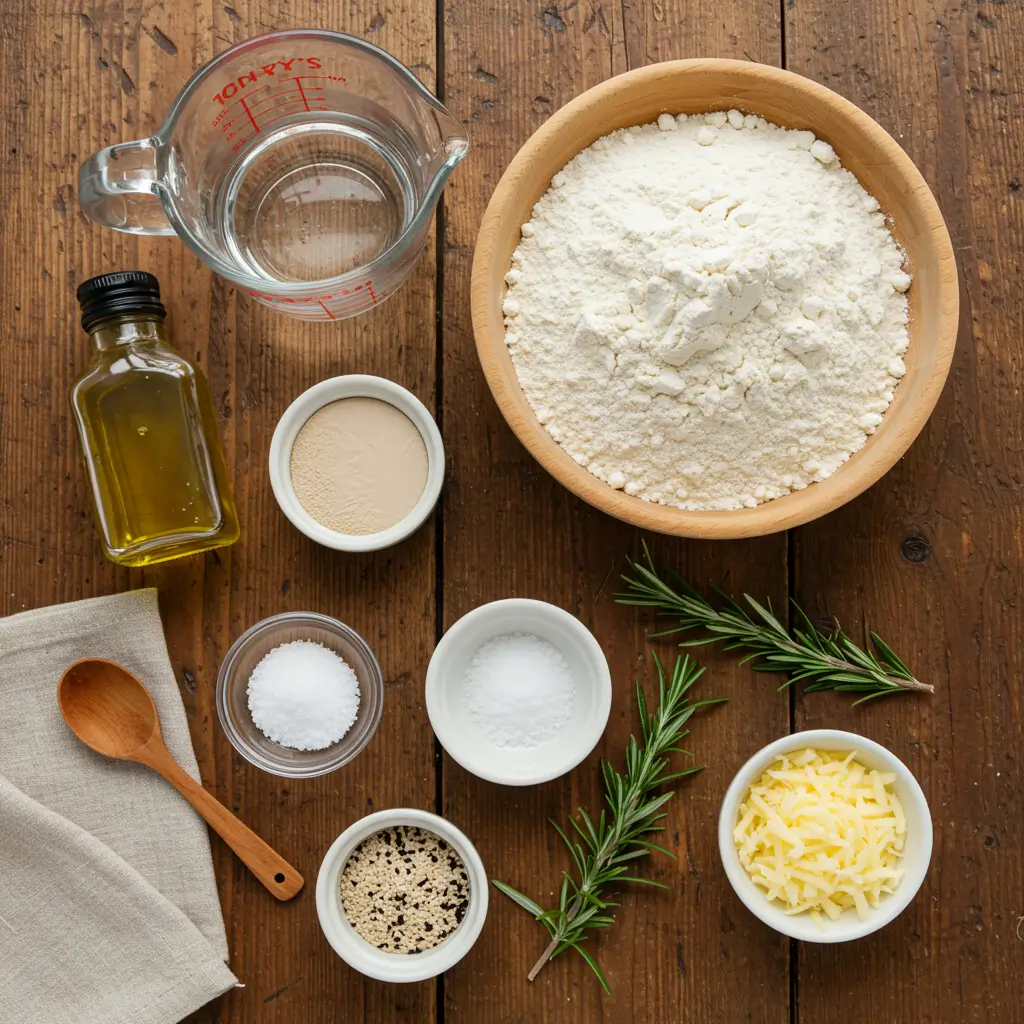
Before you begin crafting your batard bread, it’s important to gather all the right ingredients. Each component plays a key role in achieving that perfect texture, flavor, and golden crust. Here’s what you’ll need:
Basic Ingredients
- 3 ½ cups bread flour: This flour provides the structure and chewiness that’s signature to batard bread. You can also substitute a portion with whole wheat flour for a nuttier flavor.
- 1 ½ teaspoons salt: Enhances the flavor and strengthens the dough’s structure during baking.
- 1 teaspoon instant yeast: Ensures a steady, reliable rise for a light and airy interior.
- 1 ¼ cups warm water (105-110°F): Activates the yeast and hydrates the flour for proper gluten development.
- 1 tablespoon olive oil (optional): Adds a touch of richness and softness to the dough.
Optional Add-ins for Customization
- Seeds: Try sesame, sunflower, or poppy seeds for added crunch and texture.
- Herbs: Fresh rosemary, thyme, or oregano can elevate the flavor profile.
- Grains: Incorporate rolled oats or cracked wheat for a hearty twist.
Tools You’ll Need
- Mixing bowl: For combining your ingredients and forming the dough.
- Kitchen scale: Ensures accurate measurements for consistent results.
- Proofing basket or bowl: Helps the dough hold its shape during the final rise.
- Parchment paper: Makes transferring the dough seamless and prevents sticking.
- Dutch oven or baking stone: Creates the perfect environment for a crusty loaf by trapping steam.
Pro Tip
Always use high-quality ingredients for the best results. Fresh yeast and good-quality bread flour can make a noticeable difference in the texture and flavor of your bread. If you’re new to bread baking, stick with the basics before experimenting with add-ins to master the foundation.
Now that you’ve gathered everything, let’s move on to the step-by-step process of bringing your batard bread to life!
Instructions
Making batard bread at home might seem challenging at first, but with this step-by-step guide, you’ll master it like a pro. Take your time and enjoy the process—bread baking is as rewarding as it is delicious!
Step 1: Mix the Dough
In a large bowl, combine the bread flour, salt, and instant yeast using a whisk or your hands to evenly mix the dry ingredients.
Slowly pour the warm water into the bowl while stirring with a wooden spoon or your hands. Mix gently until the dough starts coming together into a rough, slightly sticky mass.
If you’re using olive oil, add it now and lightly knead the dough in the bowl until it begins to form a cohesive texture.
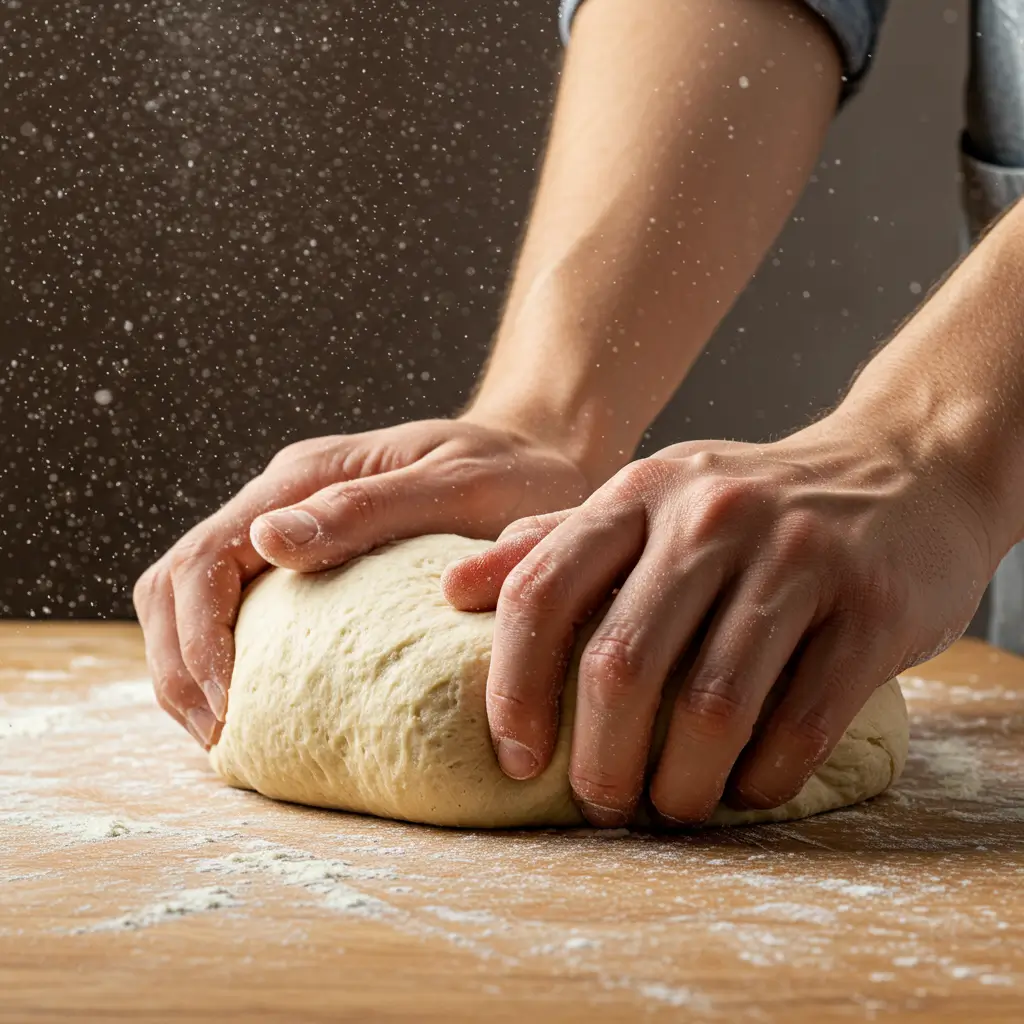
Step 2: Knead and Develop Gluten
Transfer the dough onto a lightly floured surface. Use a kneading motion—press, fold, and turn the dough—for about 8-10 minutes until it becomes smooth, elastic, and easy to handle. If it feels too sticky, sprinkle a small amount of flour, but avoid using too much to maintain the dough’s softness.
Alternatively, you can skip traditional kneading and use the “stretch-and-fold” method: stretch one side of the dough, fold it over, and rotate the dough 90 degrees. Repeat this every 30 minutes over 2 hours to gently develop gluten strength.
Step 3: First Rise (Bulk Fermentation)
Place the dough in a greased bowl, ensuring it’s lightly coated to prevent sticking. Cover the bowl with a damp towel or plastic wrap, and let it rest in a warm spot for 1-2 hours. By the end of this stage, the dough should noticeably increase in volume.
To check if it’s ready, press your finger into the dough gently. If the indentation fills back slowly, the dough is properly proofed.
Step 4: Shape the Dough
Gently deflate the dough to release any air bubbles and transfer it to a floured work surface.
Shape it into a batard loaf by flattening the dough into a rectangle, folding the edges inward like an envelope, and rolling it tightly into an oval shape. Seal the seam by pinching it closed.
Place the shaped dough, seam-side down, on a piece of parchment paper or into a proofing basket to hold its shape.
Step 5: Second Rise (Proofing)
Cover the dough loosely with a damp towel or plastic wrap and let it rise for 30-45 minutes until it becomes slightly puffed. Be cautious not to over-proof it, as this can affect the final texture and oven spring.
Step 6: Preheat the Oven
As the dough undergoes its second rise, set your oven to preheat at 475°F (245°C). Be sure to heat your Dutch oven or baking stone at the same time to ensure the perfect baking environment.
Step 7: Score and Bake
Once proofed, use a sharp knife or bread lame to score the top of the dough with shallow cuts. These slashes create space for the dough to expand beautifully as it bakes.
Carefully transfer the dough to the preheated Dutch oven (or onto the baking stone), cover it with the lid, and bake for 20 minutes. Then, remove the lid and continue baking for another 15-20 minutes, or until the crust is deep golden-brown and crisp.
Step 8: Cool and Enjoy
Remove the bread from the oven and place it on a wire rack to cool completely. Cooling the bread allows the crumb to set properly and prevents it from becoming gummy when sliced.
Once cooled, slice your loaf and enjoy it fresh with butter, olive oil, or your favorite spreads.
Pro Tip
To achieve a crustier loaf, create steam by placing a small pan of water on the bottom rack of your oven during baking. This enhances the bread’s exterior texture, giving it a beautiful, crackly crust.
By following these steps, you’ll create a stunning batard loaf that’s sure to impress your family and friends. Ready to take it up a notch? Let’s dive into some expert tips and creative variations to make this recipe your own!
Pro Tips and Variations
Creating the perfect batard bread is as much about technique as it is about creativity. Here are some expert tips and exciting variations to help you refine your skills and add your own twist to this classic recipe:
Pro Tips for Success
- Master the Right Hydration: Pay attention to the dough’s hydration level. If it feels too dry, add a teaspoon of water at a time until it feels soft and pliable. If it’s too sticky, lightly flour your hands and work surface instead of adding too much flour.
- Temperature Matters: Keep your water temperature around 105-110°F (40-45°C) to activate the yeast without killing it. If it feels warm but not hot to the touch, it’s just right.
- Patience During Proofing: Allow the dough to rise fully to achieve the desired light and airy texture. Skipping or shortening this step can lead to a dense, heavy loaf.
- Perfect Your Scoring: Use a very sharp knife or bread lame to score the dough. Deep, decisive cuts will give your loaf a professional appearance and allow it to rise evenly.
- Use Steam for a Crusty Finish: If you’re not using a Dutch oven, place a metal tray on the bottom rack of your oven. Add a cup of water to it when you put the dough in to create steam. This enhances the crust texture.
Creative Variations
- Whole Wheat Batard: Substitute up to 50% of the bread flour with whole wheat flour for a nuttier, more robust flavor. You may need to slightly increase the water to maintain proper hydration.
- Seeded Loaf: Roll your shaped dough in a mixture of sesame, sunflower, and flaxseeds before proofing to add texture and flavor. You can also mix seeds directly into the dough.
- Herbed Batard: Add 1-2 tablespoons of chopped fresh herbs like rosemary, thyme, or dill to the dough for an aromatic twist. Dried herbs work well, too—just reduce the quantity by half.
- Cheese-Infused Bread: Fold shredded cheddar, parmesan, or gruyere into the dough during the final kneading stage. A cheesy batard pairs wonderfully with soups and salads.
- Olive and Garlic Loaf: Add chopped olives and roasted garlic cloves for a Mediterranean-inspired flavor profile. These mix-ins turn a simple batard into a flavorful centerpiece.
Pro Tip
Experimenting with these variations is a great way to personalize your bread. Always start with the base recipe to understand the dough’s behavior, then gradually incorporate your preferred flavors and textures. Remember, baking is both a science and an art—don’t be afraid to get creative!
If you love experimenting with homemade bread, you might also enjoy trying this Braided Chocolate Chip Brioche Recipe—a sweet, buttery twist on classic artisan baking!
With these tips and variations, your batard bread will not only look professional but taste incredible. Let’s move on to serving suggestions to make your loaf the star of any meal!
Serving Suggestions
Batard bread is as versatile as it is delicious, making it the perfect companion to a variety of meals. Whether you’re enjoying a cozy family dinner or preparing a stunning charcuterie board, this bread has a way of elevating any dish. Here are some creative and classic ways to serve your homemade batard:
Breakfast Bliss
- Toast with a Twist: Slice the bread thickly, toast it to golden perfection, and top with avocado, poached eggs, or a drizzle of honey for a delightful start to your day.
- Sweet and Savory Pairings: Spread it with cream cheese and jam or nut butter for a quick and satisfying morning treat.
Midday Meals
- Sandwich Perfection: The sturdy yet soft crumb makes batard bread ideal for sandwiches. Fill it with deli meats, fresh veggies, and your favorite spreads for a hearty lunch.
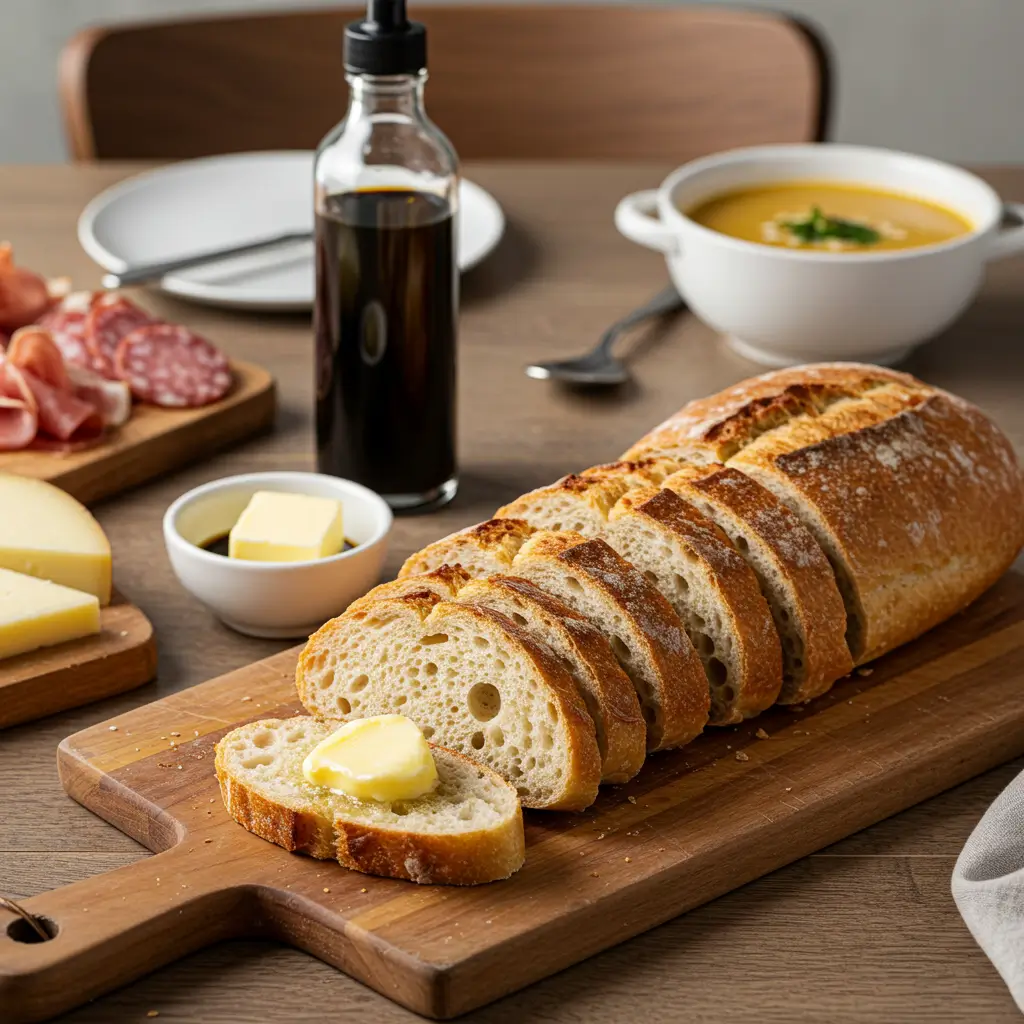
- Soup Companion: Dip slices into creamy tomato soup, French onion soup, or any broth-based favorite. The crusty edges soak up flavors beautifully.
Dinner Delight
- Side Dish Star: Serve slices alongside pasta dishes, casseroles, or roasted meats for a rustic touch that completes the meal.
- Garlic Bread Upgrade: Turn it into garlic bread by brushing slices with olive oil or butter, sprinkling with minced garlic and herbs, and broiling until golden.
Entertaining and Sharing
- Charcuterie and Cheese Boards: Pair the bread with soft cheeses like brie, hard cheeses like aged cheddar, and a mix of cured meats, olives, and fruit for a show-stopping spread.
- Tapas and Dips: Cut the loaf into cubes or strips and serve with olive tapenade, hummus, or a creamy spinach dip for a crowd-pleasing appetizer.
Storage and Leftover Ideas
- Store it Right: Keep your loaf fresh by wrapping it in a clean kitchen towel and storing it at room temperature for up to two days. For longer storage, freeze slices in an airtight bag and toast them as needed.
- Breadcrumbs and Croutons: If you have leftovers, turn them into breadcrumbs or croutons for salads and soups. Simply cube or crumble the bread, toss with olive oil and seasonings, and bake until crispy.
Pro Tip
Batard bread’s mild flavor and versatile texture make it a perfect canvas for experimenting with unique toppings or pairings. Don’t be afraid to try something new, like truffle butter, roasted red pepper spread, or even chocolate-hazelnut spread for a sweet treat!
No matter how you choose to serve it, batard bread is sure to impress your guests and family alike. With its artisan charm and endless possibilities, this loaf will quickly become a staple in your kitchen. Let’s wrap things up with some common questions to ensure your success!
Conclusion
Congratulations! You’ve just unlocked the art of baking a homemade batard bread that’s not only delicious but also versatile enough to complement any meal. From mastering the basics of mixing and kneading to perfecting your scoring and baking techniques, you’ve taken an incredible journey into the world of artisan bread.
This batard loaf, with its golden crust and soft, airy interior, is the ultimate crowd-pleaser. Whether you’re savoring it fresh out of the oven, pairing it with soups and stews, or experimenting with creative toppings, this bread is bound to become a household favorite. Plus, the endless variations—like herbed, seeded, or cheesy batards—give you the chance to personalize it to your taste.
Remember, baking is a balance of precision and creativity. Don’t be afraid to tweak the recipe, try new flavors, and most importantly, enjoy the process. Each loaf is a reflection of your effort and love for homemade creations.
If you’ve tried this recipe, let me know how it turned out! Share your variations, tips, or any challenges you faced—I’d love to hear your stories. And if you’re ready for your next baking adventure, check out some of my other recipes for more inspiration. Happy baking!
If you’re interested in exploring more about batard bread and expert baking tools, check out this batard bread guide by Le Creuset for additional insights and premium bakeware recommendations.
Batard Bread
Ingredients
Basic Ingredients
- 3 ½ cups bread flour: This flour provides the structure and chewiness that’s signature to batard bread. You can also substitute a portion with whole wheat flour for a nuttier flavor.
- 1 ½ teaspoons salt: Enhances the flavor and strengthens the dough’s structure during baking.
- 1 teaspoon instant yeast: Ensures a steady reliable rise for a light and airy interior.
- 1 ¼ cups warm water 105-110°F: Activates the yeast and hydrates the flour for proper gluten development.
- 1 tablespoon olive oil optional: Adds a touch of richness and softness to the dough.
Optional Add-ins for Customization
- Seeds: Try sesame sunflower, or poppy seeds for added crunch and texture.
- Herbs: Fresh rosemary thyme, or oregano can elevate the flavor profile.
- Grains: Incorporate rolled oats or cracked wheat for a hearty twist.
Tools You’ll Need
- Mixing bowl: For combining your ingredients and forming the dough.
- Kitchen scale: Ensures accurate measurements for consistent results.
- Proofing basket or bowl: Helps the dough hold its shape during the final rise.
- Parchment paper: Makes transferring the dough seamless and prevents sticking.
- Dutch oven or baking stone: Creates the perfect environment for a crusty loaf by trapping steam.
Instructions
Step 1: Mix the Dough
- In a large bowl, combine the bread flour, salt, and instant yeast using a whisk or your hands to evenly mix the dry ingredients.
- Slowly pour the warm water into the bowl while stirring with a wooden spoon or your hands. Mix gently until the dough starts coming together into a rough, slightly sticky mass.
- If you’re using olive oil, add it now and lightly knead the dough in the bowl until it begins to form a cohesive texture.
Step 2: Knead and Develop Gluten
- Transfer the dough onto a lightly floured surface. Use a kneading motion—press, fold, and turn the dough—for about 8-10 minutes until it becomes smooth, elastic, and easy to handle. If it feels too sticky, sprinkle a small amount of flour, but avoid using too much to maintain the dough’s softness.
- Alternatively, you can skip traditional kneading and use the “stretch-and-fold” method: stretch one side of the dough, fold it over, and rotate the dough 90 degrees. Repeat this every 30 minutes over 2 hours to gently develop gluten strength.
Step 3: First Rise (Bulk Fermentation)
- Place the dough in a greased bowl, ensuring it’s lightly coated to prevent sticking. Cover the bowl with a damp towel or plastic wrap, and let it rest in a warm spot for 1-2 hours. By the end of this stage, the dough should noticeably increase in volume.
- To check if it’s ready, press your finger into the dough gently. If the indentation fills back slowly, the dough is properly proofed.
Step 4: Shape the Dough
- Gently deflate the dough to release any air bubbles and transfer it to a floured work surface.
- Shape it into a batard loaf by flattening the dough into a rectangle, folding the edges inward like an envelope, and rolling it tightly into an oval shape. Seal the seam by pinching it closed.
- Place the shaped dough, seam-side down, on a piece of parchment paper or into a proofing basket to hold its shape.
Step 5: Second Rise (Proofing)
- Cover the dough loosely with a damp towel or plastic wrap and let it rise for 30-45 minutes until it becomes slightly puffed. Be cautious not to over-proof it, as this can affect the final texture and oven spring.
Step 6: Preheat the Oven
- As the dough undergoes its second rise, set your oven to preheat at 475°F (245°C). Be sure to heat your Dutch oven or baking stone at the same time to ensure the perfect baking environment.
Step 7: Score and Bake
- Once proofed, use a sharp knife or bread lame to score the top of the dough with shallow cuts. These slashes create space for the dough to expand beautifully as it bakes.
- Carefully transfer the dough to the preheated Dutch oven (or onto the baking stone), cover it with the lid, and bake for 20 minutes. Then, remove the lid and continue baking for another 15-20 minutes, or until the crust is deep golden-brown and crisp.
Step 8: Cool and Enjoy
- Remove the bread from the oven and place it on a wire rack to cool completely. Cooling the bread allows the crumb to set properly and prevents it from becoming gummy when sliced.
- Once cooled, slice your loaf and enjoy it fresh with butter, olive oil, or your favorite spreads.
Notes
- Calories: 180
-
Fat: 2g
- Saturated Fat: 0.3g
-
Carbohydrates: 34g
- Fiber: 2g
- Sugar: 1g
- Protein: 6g
- Sodium: 350mg
FAQs
Here are some common questions about making batard bread, along with clear answers to ensure your baking experience is smooth and enjoyable:
1. Can I make batard bread without a Dutch oven?
Absolutely! While a Dutch oven helps create steam for a crisp crust, you can achieve similar results by placing a metal tray on the bottom rack of your oven. Pour a cup of water into the tray as you place the bread in the oven to generate steam. Alternatively, bake the bread on a preheated baking stone for an artisan finish.
2. How can I tell if my dough is properly proofed?
To check if your dough is ready, perform the “poke test.” Gently press a finger into the dough—if the indentation springs back slowly, it’s ready to bake. If it bounces back too quickly, it needs more time, and if it doesn’t spring back at all, it may be over-proofed.
3. Can I use all-purpose flour instead of bread flour?
Yes, you can, but the texture will differ slightly. Bread flour has more protein, which helps create a chewier crumb and better structure. If using all-purpose flour, you may need to reduce the water slightly to account for the lower protein content.
4. How do I store leftover batard bread?
Wrap your bread in a clean kitchen towel or store it in a paper bag at room temperature for up to 2 days. For longer storage, slice the loaf, place the slices in an airtight container or freezer bag, and freeze for up to 3 months. Toast frozen slices directly for quick enjoyment.
5. Why is my crust too hard or soft?
• If your crust is too hard: You might have overbaked the bread. Reduce the baking time slightly or lower the oven temperature.
• If your crust is too soft: This could be due to insufficient steam during baking. Try adding a tray of water to your oven or covering the bread with foil if it’s browning too quickly.
6. Can I add mix-ins like nuts or dried fruit?
Yes! Add-ins like chopped nuts, dried fruits, or seeds can elevate the flavor and texture of your batard bread. Mix them in during the final kneading stage to ensure they are evenly distributed.
7. Why didn’t my bread rise properly in the oven?
This could be due to under-proofing or a lack of oven spring. Make sure your dough has risen adequately during proofing, and always preheat your oven fully before baking. Using a hot Dutch oven or baking stone can also improve the rise.
8. How do I prevent my dough from sticking during shaping or proofing?
Lightly flour your work surface, hands, and proofing basket to prevent sticking. You can also line your proofing basket with parchment paper or use a dusting of rice flour, which works well for avoiding stickiness.
2 thoughts on “Batard Bread Love: Bake Like a Pro at Home”