
Introduction
If you’ve ever walked past a bakery in New York, you might have seen the famous half-moon cookies, also known as black and white cookies. These delicious treats are loved by many for their unique two-toned icing and cake-like consistency, making them a popular choice in American baking.
Originally a specialty from New York, moon cookies have now become a favorite across the country, found in busy delis in Manhattan and cozy bakeries in small towns. What makes them so appealing is the combination of a soft cookie base with contrasting flavors of chocolate and vanilla icing.
Do you want to learn how to make these classic cookies? In this guide, you’ll find professional baking methods, tried-and-true advice, and innovative twists to take your moon cookie skills to the next level. Whether you’re an experienced baker or new to making these cookies, you’ll discover the secrets behind achieving the perfect shape, smooth icing, and delightful texture that sets moon cookies apart.
Understanding Moon Cookies
Moon cookies stand out in the cookie world with their distinctive cake-like texture that sets them apart from traditional crispy or chewy cookies. These treats feature a soft, pillowy base that’s closer to a mini cake than a standard cookie. When you bite into a properly made moon cookie, you’ll experience a tender crumb that practically melts in your mouth.
The secret behind this unique texture lies in the specific ratio of ingredients:
- Higher proportion of cake flour
- Extra buttermilk for moisture
- Careful balance of butter and sugar
- Precise mixing technique
The iconic two-toned icing is what truly defines a moon cookie. The classic combination features:
Traditional Icing Variations:
- Dark Side: Rich chocolate icing made with cocoa powder and vanilla
- Light Side: Pure vanilla fondant-style icing with a glossy finish
You can identify an authentic moon cookie by its perfect symmetry – the icing line should run straight through the middle, creating two distinct halves. The icing itself should be firm enough to set but soft enough to yield when bitten into.
Icing Consistency Guide:
- Thick enough to hold its shape
- Thin enough to spread smoothly
- Sets with a slight sheen
- Doesn’t crack when bitten
The icing’s texture plays a crucial role in the cookie’s overall appeal. When applied correctly, it creates a protective layer that helps keep the cookie base fresh while adding a complementary sweetness that doesn’t overpower the delicate cake-like foundation.
If you love fluffy baked goods, don’t miss our Cloud Cake: Fall in Love with the Ultimate Fluff recipe for more tips on achieving the perfect texture.
Classic Moon Cookie Recipe

The secret to professional-quality moon cookies lies in your ingredients and technique. Here’s what you’ll need to create these beloved treats:
Essential Ingredients:
- 3 cups all-purpose flour
- 1 cup unsalted butter (room temperature)
- 1¾ cups granulated sugar
- 2 large eggs
- 1 cup buttermilk
- ½ teaspoon baking soda
- ½ teaspoon vanilla extract
- ¼ teaspoon salt
The magic of moon cookies happens during the creaming process. Room temperature butter combines with sugar to create tiny air pockets, resulting in that signature cake-like texture you’re looking for. Cold butter won’t cream properly, so patience is key – let it sit at room temperature for at least an hour before starting.
Step-by-Step Instructions:
- Sift your dry ingredients together in a bowl. This step distributes the baking soda and salt evenly throughout the flour.
- In your stand mixer, beat the butter on medium speed for 1 minute. Add sugar gradually and continue beating for 5-7 minutes until the mixture becomes light and fluffy. You’ll notice the color changing to a pale yellow – this is exactly what you want.
- Add the eggs individually, incorporating each one completely before adding the next. Beat until smooth and well combined.
- Alternate adding your dry ingredients and buttermilk to the butter mixture. Start and end with the flour mixture, adding in three portions while mixing on low speed. The sequence looks like this:
- ⅓ flour mixture
- ½ buttermilk
- ⅓ flour mixture
- ½ buttermilk
- ⅓ flour mixture
- Mix just until combined. Your batter should be thick but smooth, similar to cake batter.
The temperature of your ingredients plays a crucial role in achieving the perfect texture. Cold eggs can cause your butter mixture to curdle, while warm buttermilk helps maintain a consistent temperature throughout the mixing process. Let these ingredients reach room temperature before you start baking.
For more insights on cake-making methods which can also apply here, consider exploring different techniques that may enhance your baking experience further.
Baking Techniques for Perfect Moon Cookies
The secret to professional-looking moon cookies lies in mastering essential baking techniques. Your dough needs at least 2 hours of chilling time in the refrigerator – this crucial step prevents the cookies from spreading too thin during baking.
Pre-Baking Preparation:
- Place shaped dough balls in the refrigerator for 2-4 hours
- Line baking sheets with parchment paper or silicone mats
- Space cookies 3 inches apart to allow for spreading
- Press dough balls gently with your palm to create uniform thickness
Temperature Control Tips:
- Preheat your oven to 375°F (190°C) for 15-20 minutes
- Monitor your oven’s temperature with a reliable thermometer for precise baking results
- Rotate baking sheets halfway through for even heat distribution
- Keep the oven door closed while baking to maintain consistent temperature
Creating the Perfect Dome Shape:
- Drop rounded tablespoons of chilled dough onto baking sheets
- Press the center slightly less than the edges
- Maintain dough temperature below 40°F until baking
- Watch for slight browning around edges as your timing cue
Common Baking Issues:
- Flat Cookies: Dough too warm or butter too soft
- Uneven Browning: Oven hot spots or incorrect rack placement
- Cracked Tops: Oven temperature too high
You’ll know your moon cookies are perfectly baked when they’re lightly golden around the edges with a pale top. When gently pressed with a fingertip, the center should feel set and bounce back lightly. Allow cookies to rest on the baking sheet for 5 minutes, then gently transfer them to a cooling rack to prevent breakage and ensure proper texture development.
- Spreading: Insufficient chilling time
For another classic cookie recipe with a unique twist, try our guide on How to Make Easy Madeline Cookies with Cream.
Creative Variations of Moon Cookies
Your gluten-free journey doesn’t mean saying goodbye to these beloved treats. A perfect gluten-free moon cookie starts with the right flour blend:
- 1 part white rice flour
- 1 part tapioca starch
- 1 part potato starch
- 1/2 part almond flour
This combination creates the signature cake-like texture that defines authentic moon cookies. Add 1/4 teaspoon of xanthan gum per cup of flour blend to prevent crumbling.
Alternative Flour Options:
- Sorghum flour adds a nutty undertone
- Millet flour brings subtle sweetness
- Oat flour creates a tender crumb
- Cassava flour offers neutral flavor
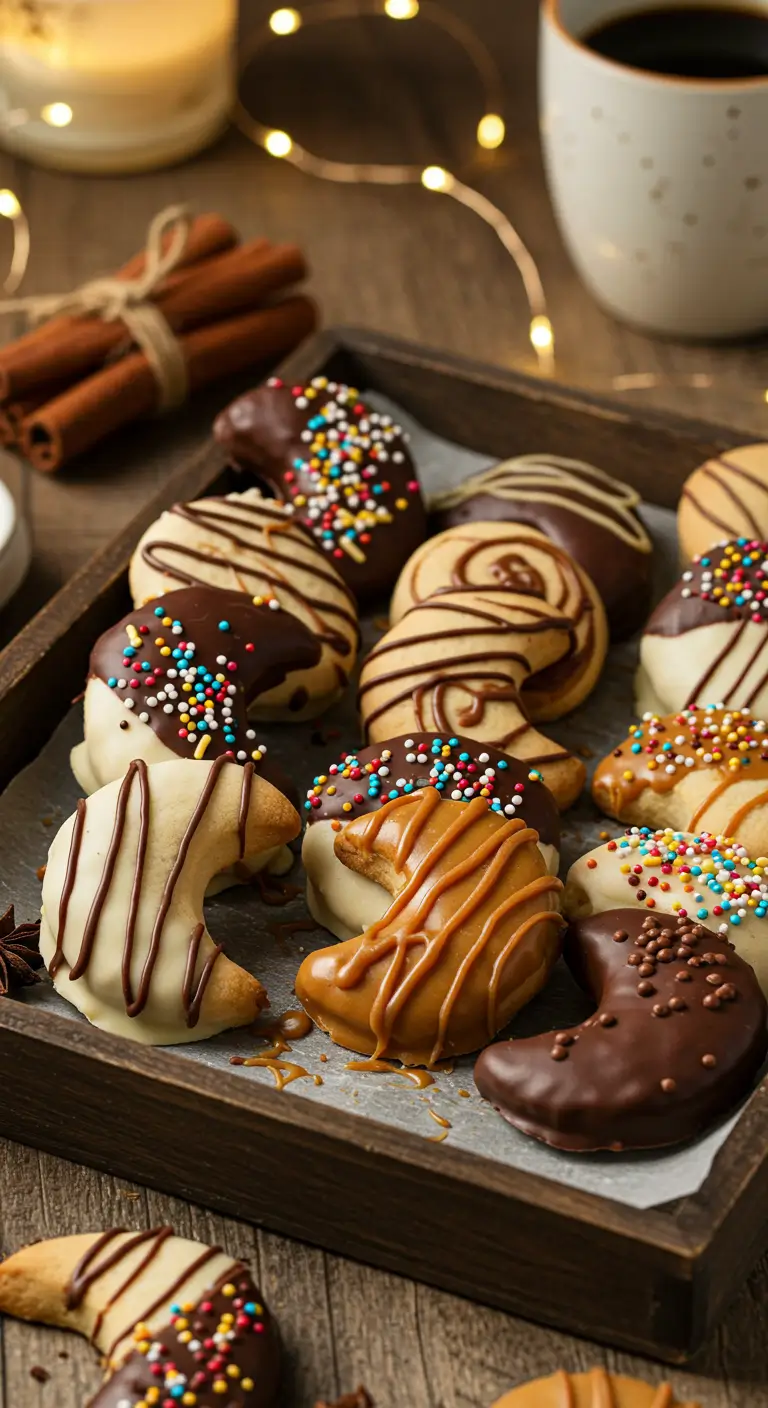
The magic of moon cookies extends beyond the classic black and white icing. Try these creative flavor combinations:
Innovative Icing Ideas:
- Matcha Green Tea: Combine white chocolate with matcha powder
- Raspberry Dream: Mix freeze-dried raspberry powder into vanilla icing
- Lavender Bliss: Infuse white icing with culinary lavender
- Espresso Swirl: Add instant espresso to dark chocolate icing
- Orange Blossom: Blend orange extract with white chocolate
Pro Tips for Alternative Icings:
- Use natural food coloring for vibrant hues
- Incorporate freeze-dried fruit powders for intense flavors
- Mix in nut butters for rich, creamy textures
- Add citrus zests for bright notes
The texture remains consistent across variations when you maintain the proper ratio of wet to dry ingredients. Watch your batter consistency – it should spread slightly when dropped but hold its shape.
For more creative dessert designs, check out our guide on Unicorn Cake Bliss: Irresistibly Beautiful Recipes.
Seasonal Takes on Moon Cookies
Transform your moon cookies into seasonal delights by incorporating flavors and designs that celebrate nature’s changing rhythms. Each season brings unique opportunities to reimagine these classic treats.
Fall Favorites:
- Pumpkin spice moon cookies with maple glaze
- Cinnamon-apple variation with caramel drizzle
- Nutmeg and brown butter frosting
- Dark chocolate-orange combination
Spring Sensations:
- Lemon-lavender with violet icing
- Rose water and vanilla bean
- Fresh mint chocolate chip
- Strawberry cream cheese frosting
Summer Inspirations:
- Coconut lime with tropical glazes
- Blueberry lemon burst
- White chocolate and raspberry swirl
- Passion fruit and mango combination
Winter Warmth:
- Gingerbread spice with white chocolate
- Peppermint chocolate swirl
- Vanilla bean with crushed candy cane
- Espresso dark chocolate
Create stunning lunar-inspired designs using specialized cookie cutters shaped like different moon phases. A moon phase cookie set includes:
- New moon (complete circle)
- Waxing crescent
- First quarter
- Waxing gibbous
- Full moon
- Waning gibbous
- Last quarter
- Waning crescent
Enhance your lunar designs with metallic edible paint or lustrous pearl dust. Silver and gold accents catch the light, creating an ethereal effect that mirrors the actual moon’s surface. Try marbling techniques with contrasting icings to replicate the moon’s natural patterns and craters.
Serving Suggestions and Pairings for Moon Cookies
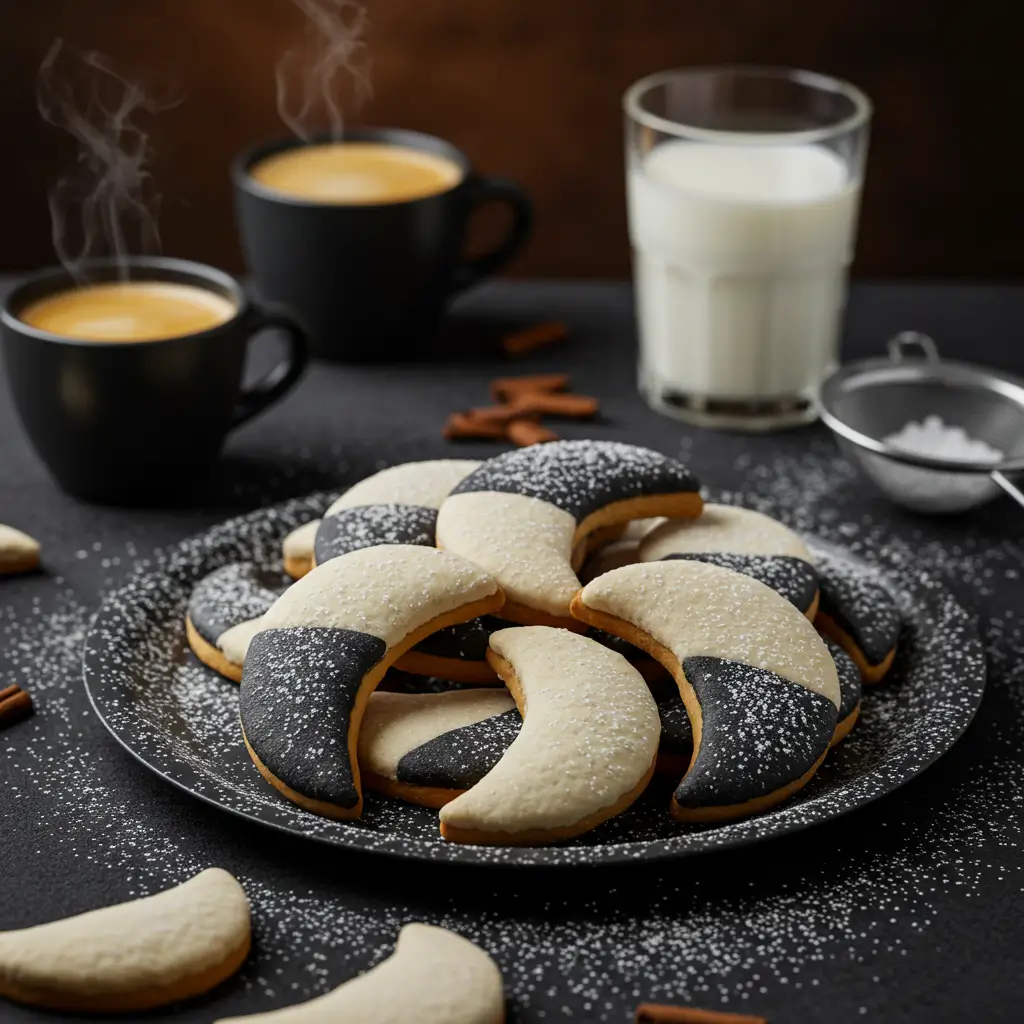
Your moon cookies deserve a presentation that matches their celestial charm. Create an eye-catching display by arranging them in a crescent moon shape on a dark-colored platter – the contrast will make the black and white icing pop. For added drama, dust the serving plate with powdered sugar to mimic a starry night sky.
Creative Display Ideas:
- Stack cookies in ascending size to create a 3D moon effect
- Use mirror platters to reflect light and enhance visual appeal
- Place cookies on tiered stands with LED lights underneath
- Arrange them in spiral patterns for a galaxy-inspired look
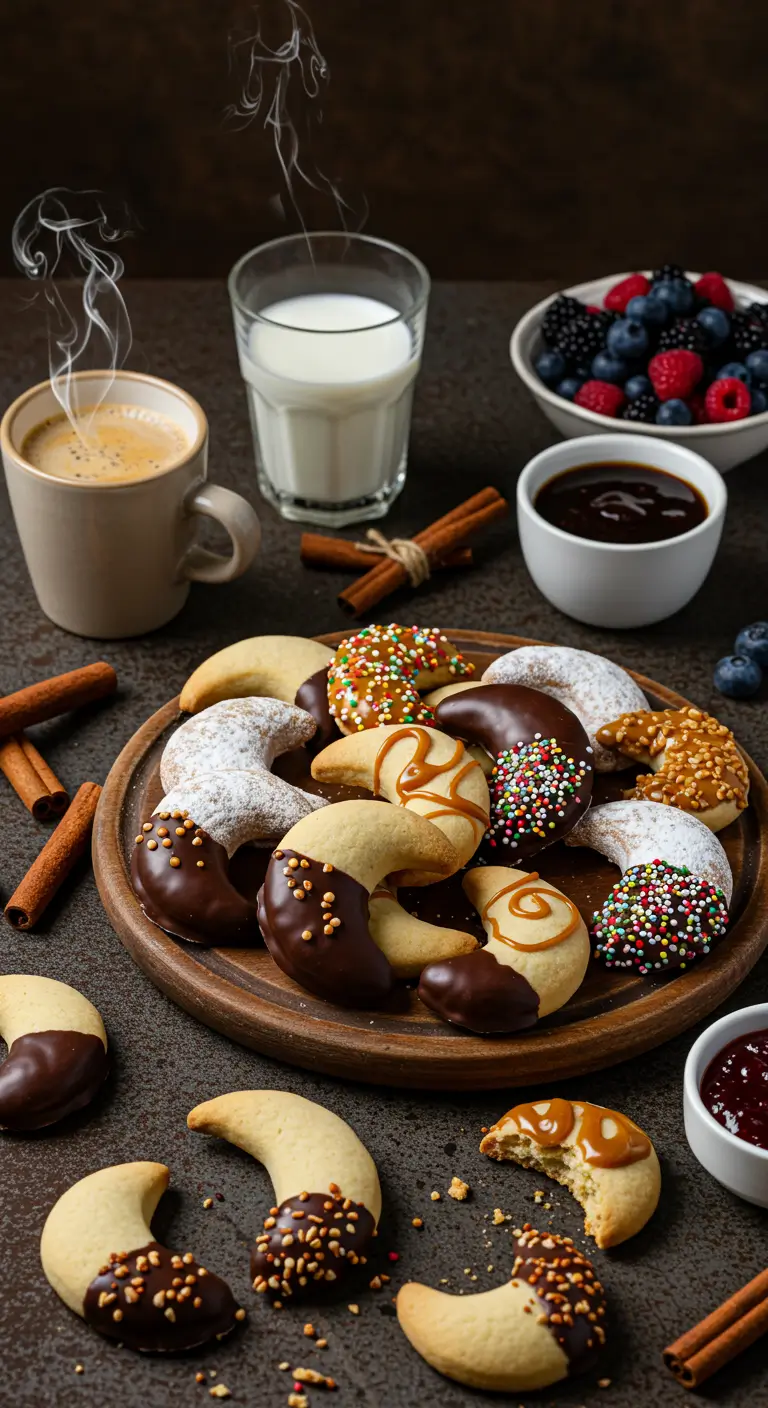
The rich flavors of moon cookies pair beautifully with carefully selected beverages. A bold espresso brings out the chocolate notes, while chai tea complements the vanilla side with its warm spices. For special occasions, try these sophisticated pairings:
- Hot Beverages:
- French press coffee
- Earl Grey tea
- Hot chocolate with marshmallows
- Spiced golden milk
- Cold Drinks:
- Iced vanilla latte
- Cold brew coffee
- Milk (classic choice)
- Sparkling water with lemon
For large gatherings, consider setting up a beverage station next to your cookie display. Include drink cards suggesting specific pairings to guide your guests toward the perfect flavor combinations.
___________

Moon Cookies
Ingredients
For the Cookie Dough:
- 3 cups all-purpose flour or gluten-free flour blend for a gluten-free version
- 1 cup unsalted butter room temperature
- 1¾ cups granulated sugar
- 2 large eggs room temperature
- 1 cup buttermilk room temperature
- ½ teaspoon baking soda
- ½ teaspoon vanilla extract
- ¼ teaspoon salt
For the Vanilla Icing (White Side):
- 2 cups powdered sugar
- 2-3 tablespoons milk or heavy cream
- ½ teaspoon vanilla extract
- 1-2 drops lemon juice optional, for shine
For the Chocolate Icing (Dark Side):
- 2 cups powdered sugar
- 3 tablespoons unsweetened cocoa powder
- 2-3 tablespoons milk or heavy cream
- ½ teaspoon vanilla extract
Optional Additions:
- 1-2 drops black food coloring for a deeper black icing
- Edible glitter or pearl dust for a celestial effect
Instructions
Step 1: Prepare the Dough
- Sift Dry Ingredients: In a medium bowl, sift together the flour, baking soda, and salt. Set aside.
- Cream Butter and Sugar: In a stand mixer or using a hand mixer, beat the room-temperature butter on medium speed for 1 minute. Gradually add the sugar and continue beating for 5-7 minutes until the mixture is light, fluffy, and pale yellow.
- Add Eggs: Beat in the eggs one at a time, ensuring each egg is fully incorporated before adding the next. Mix in the vanilla extract.
- Combine Wet and Dry Ingredients: On low speed, alternate adding the dry ingredients and buttermilk in three parts:
- Start with ⅓ of the flour mixture.
- Add ½ of the buttermilk.
- Repeat, ending with the flour mixture. Mix just until combined—do not overmix.
Step 2: Chill the Dough
- Shape the Dough: Use a cookie scoop or tablespoon to portion the dough into 24 equal balls (about 2 tablespoons each). Place them on a parchment-lined baking sheet.
- Chill: Cover the dough balls with plastic wrap and refrigerate for 2-4 hours. This step is crucial to prevent spreading and achieve the perfect dome shape.
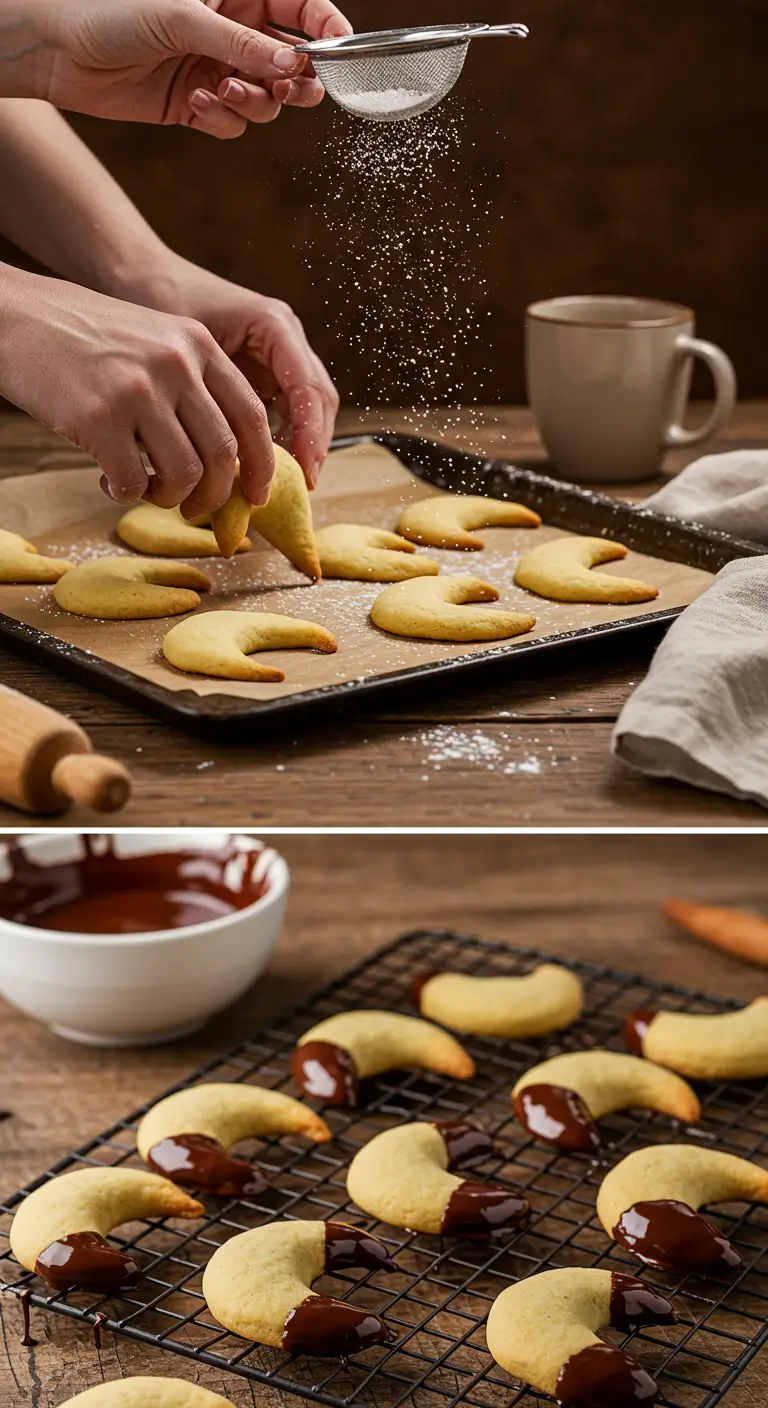
Step 3: Bake the Cookies
- Preheat Oven: Preheat your oven to 375°F (190°C) and line baking sheets with parchment paper or silicone mats.
- Flatten Slightly: Remove the dough from the fridge. Gently press each ball with your palm to create a uniform thickness (about ½ inch thick).
- Bake: Place the cookies on the prepared sheets, spacing them 3 inches apart. Bake for 10-12 minutes, rotating the pans halfway through, until the edges are lightly golden and the centers are set.
- Cool: Let the cookies cool on the baking sheet for 5 minutes, then transfer them to a wire rack to cool completely.
Step 4: Prepare the Icings
- Vanilla Icing: In a medium bowl, whisk together powdered sugar, milk (start with 2 tablespoons), and vanilla extract until smooth. Add more milk, 1 teaspoon at a time, until the icing is thick but spreadable. Add lemon juice for shine if desired.
- Chocolate Icing: In another bowl, whisk together powdered sugar, cocoa powder, milk (start with 2 tablespoons), and vanilla extract. Adjust the consistency with more milk as needed. For a deeper black color, add 1-2 drops of black food coloring.
Step 5: Ice the Cookies
- Divide the Cookies: Use a knife or offset spatula to spread the vanilla icing on one half of each cookie and the chocolate icing on the other half. Aim for a clean, straight line down the middle.
- Let Set: Allow the icing to set at room temperature for 1-2 hours or until firm.
Step 6: Serve and Enjoy!
- Presentation: Arrange the cookies on a dark platter, dust with powdered sugar for a starry effect, and serve with coffee, tea, or milk.
Notes
| Nutrient | Amount |
|---|---|
| Calories | 180 kcal |
| Total Fat | 8g |
| Saturated Fat | 5g |
| Protein | 2g |
| Carbohydrates | 25g |
| Sugars | 15g |
| Cholesterol | 30mg |
| Sodium | 50mg |
| Fiber | 0.5g |
Conclusion
Making moon cookies at home opens up a world of creative possibilities. Your kitchen becomes a place where you can experiment with different flavors – try adding a hint of cardamom to your vanilla icing or infusing your chocolate with mint. Each time you bake, you’ll discover something new and delightful.
The magic of baking these iconic treats lies in the personal touch you bring to them. Whether you stick to the classic black and white design or explore colorful seasonal variations, your moon cookies tell your unique story.
Remember: there’s no “perfect” moon cookie – each baker adds their own style and flair to the recipe. The joy comes from the process itself – mixing, baking, decorating, and sharing with loved ones.
Ready to start your moon cookie adventure? Your kitchen is waiting, and a batch of these beloved treats could be just an hour away. Happy baking! 🌙
FAQs (Frequently Asked Questions)
What are moon cookies?
Moon cookies, also known as half-moon cookies or black and white cookies, are popular treats characterized by their cake-like texture and unique icing combinations, typically featuring chocolate on one half and vanilla on the other.
What is the key takeaway from the article on moon cookies?
Readers will learn how to make moon cookies like a pro with expert tips and tricks that enhance both flavor and presentation.
Why is chilling the dough important when making moon cookies?
Chilling the dough before baking is crucial to prevent spreading, ensuring that the moon cookies maintain their shape and achieve a beautiful dome during baking.
Can I make gluten-free moon cookies?
Yes! There are gluten-free adaptations available using flour blends that mimic the texture of traditional moon cookies, allowing everyone to enjoy this delightful treat.
What are some creative variations of moon cookies I can try?
You can experiment with unique icing variations such as matcha or raspberry-flavored icings, as well as seasonal flavors like pumpkin spice for fall or lemon-lavender for spring.
What are some recommended beverages to pair with moon cookies?
Moon cookies pair wonderfully with beverages like chai tea or espresso, enhancing the overall dessert experience at any event.